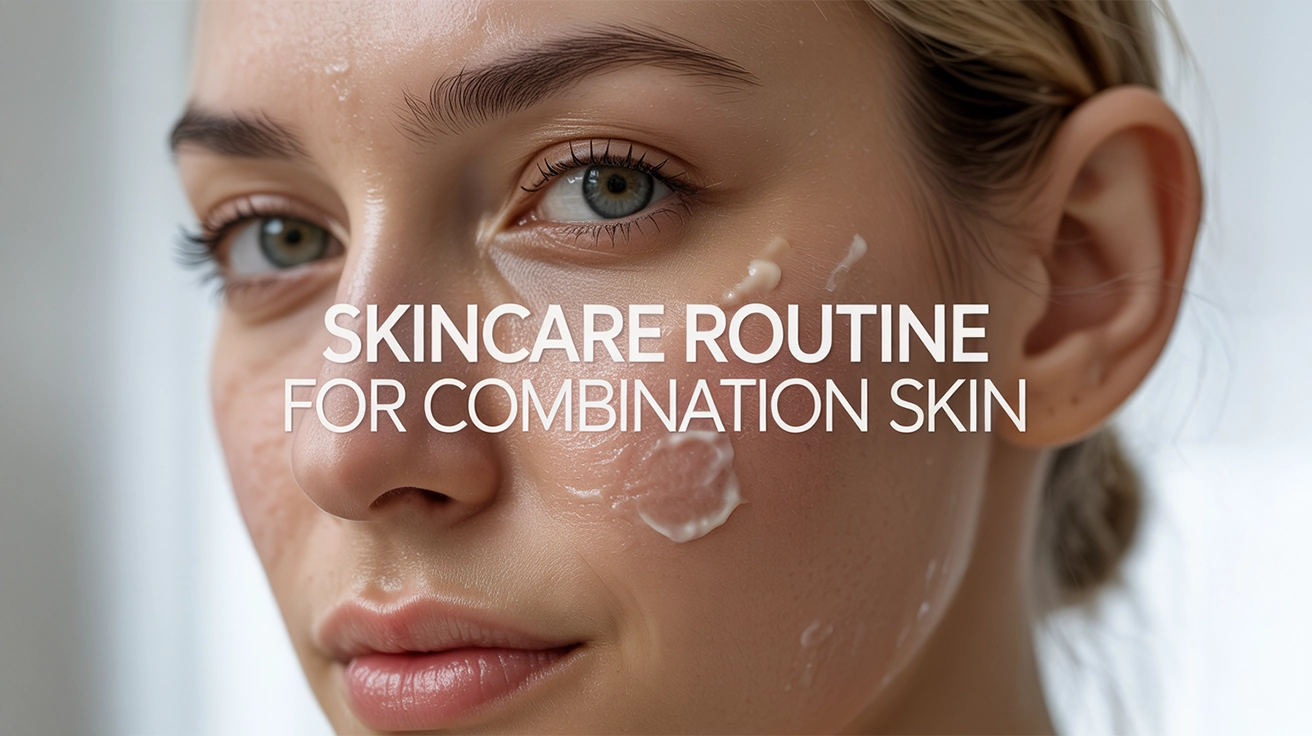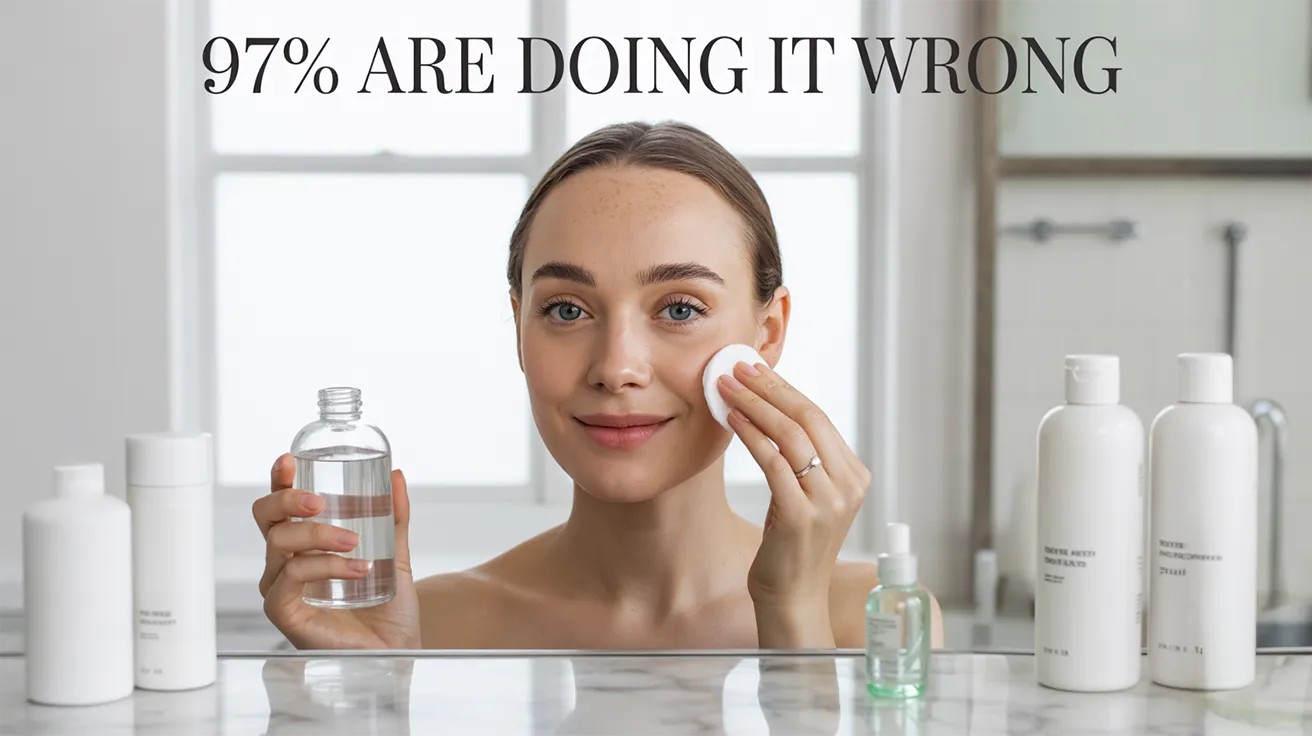
You’re tired of spending hundreds on fancy acne treatments that barely work. The solution isn’t hiding in expensive dermatology offices—it’s sitting in your kitchen right now.
This guide is for anyone dealing with stubborn breakouts, blackheads, or acne scars who wants real results without breaking the bank. You’ll discover why certain homemade face mask for acne recipes work better than pricey alternatives, plus learn the science behind natural acne fighting ingredients that cost pennies.
We’ll walk you through the essential ingredients you already have at home that target acne at its source. You’ll get step-by-step recipes for the most effective DIY acne treatment masks, from clay-based formulas that unclog pores to honey-oatmeal combinations that heal inflammation. Finally, we’ll cover proper application techniques and safety tips to maximize your results and avoid common mistakes that can make breakouts worse.
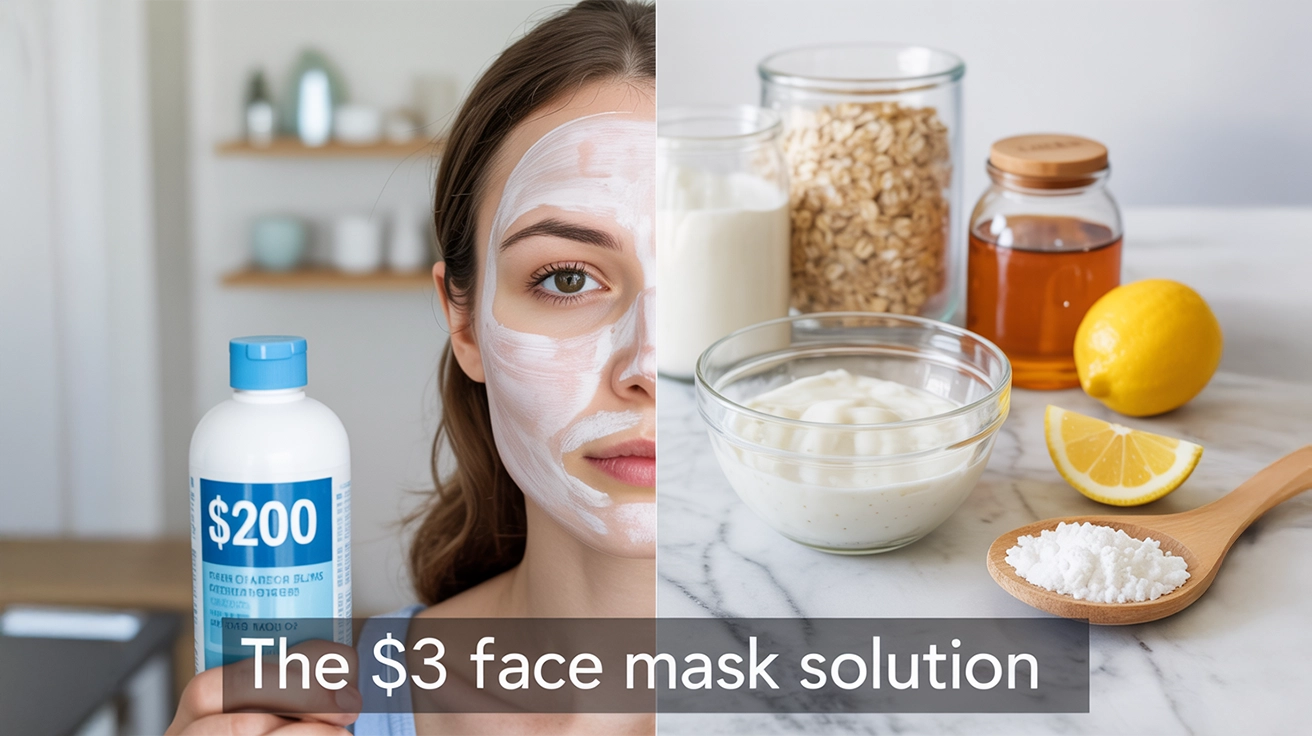
These cheap face mask recipes use proven ingredients like turmeric, tea tree oil, and green tea—the same active compounds found in expensive treatments, just without the markup.
Acne is a common skin condition that occurs when your hair follicles become plugged with oil and dead skin cells. This blockage creates the perfect environment for various types of blemishes to develop, including whiteheads, blackheads, and pimples that can affect people of all ages, though it’s most prevalent among teenagers.
The formation process begins with four main factors working together. First, your sebaceous glands produce excess oil (sebum), particularly in areas like your face, forehead, chest, upper back, and shoulders where these glands are most concentrated. Second, your hair follicles become clogged by this oil combined with dead skin cells. Third, bacteria multiply within these blocked follicles, and finally, inflammation occurs as your body responds to this bacterial overgrowth.
When the follicle wall bulges while remaining closed, you develop a whitehead. If the plug reaches the surface and becomes exposed to air, it darkens and forms a blackhead – despite common misconceptions, this dark appearance isn’t dirt but rather oil and bacteria that have oxidized. Pimples appear as raised red spots with white centers when blocked follicles become inflamed or infected. More severe forms include nodules and cystic lesions, which develop when blockages and inflammation occur deep within your hair follicles, creating painful lumps beneath your skin’s surface.
Understanding what triggers your acne can help you make informed decisions about treatment approaches, including choosing effective homemade face mask ingredients. Several key factors can trigger or worsen your acne outbreaks.
Hormonal changes represent the most significant trigger for many people. Androgens, hormones that increase during puberty in both boys and girls, cause your sebaceous glands to enlarge and produce more sebum. Women may also experience hormone-related breakouts during midlife, particularly around menstruation when hormonal fluctuations are most pronounced.
Stress doesn’t directly cause acne, but if you already have acne, stress can make your condition significantly worse. Your body’s stress response can trigger inflammatory processes that exacerbate existing breakouts and make your skin more reactive to other triggers.
Diet plays a more complex role than previously understood. Recent studies indicate that consuming carbohydrate-rich foods like bread, bagels, and chips may worsen your acne. However, contrary to popular belief, chocolate and greasy foods have little to no direct effect on acne development.
Genetics strongly influences your likelihood of developing acne. If both your parents experienced acne, you’re much more likely to develop it too. Your genetic predisposition affects how your skin responds to hormonal changes, sebum production, and inflammatory responses.
Additional triggers include certain medications containing corticosteroids, testosterone, or lithium, as well as friction or pressure on your skin from items like phones, helmets, or tight clothing.
Now that we’ve covered how acne forms and what triggers it, you can better understand why homemade face masks can be remarkably effective for acne treatment. Unlike expensive commercial products that often contain harsh chemicals and potential irritants, homemade acne masks work with your skin’s natural healing processes using ingredients that target the same fundamental causes that expensive treatments address.
The effectiveness of DIY acne treatments lies in their ability to address the four main factors of acne formation. Many common household ingredients possess natural antibacterial properties that combat the bacteria responsible for inflammation in your clogged pores. Others work as natural exfoliants, helping to remove the dead skin cells that contribute to follicle blockages, while some ingredients help regulate oil production without stripping your skin of its natural protective barrier.
What makes homemade acne masks particularly advantageous is their gentle yet effective approach. While commercial treatments often cause irritation, dryness, or adverse reactions – as the FDA warns about some popular nonprescription acne products – natural ingredients typically work more harmoniously with your skin’s biology. This gentler approach means you can use these treatments more frequently without the harsh side effects that might force you to discontinue treatment.
Additionally, you have complete control over the ingredients in your homemade pimple mask, allowing you to avoid potential allergens or irritants that might be present in commercial formulations. This customization is especially valuable since acne affects everyone differently, and what works for one person may not work for another. With DIY face mask recipes, you can adjust ingredients and concentrations based on your skin’s specific needs and sensitivities.
Green tea stands out as one of the most powerful ingredients you can use in your homemade face mask for acne. This remarkable ingredient contains high levels of antioxidants that work to reduce inflammation and calm irritated skin. When you incorporate green tea into your DIY acne treatment routine, you’re harnessing centuries of proven skincare wisdom at a fraction of the cost of expensive commercial products.
The anti-inflammatory properties of green tea make it particularly effective for soothing red, inflamed acne lesions. You can easily prepare green tea for your natural acne remedies by brewing a strong cup and allowing it to cool completely before mixing it with other ingredients. The antioxidants in green tea help protect your skin from environmental damage while promoting healing of existing breakouts.
Clay-based ingredients form the foundation of many effective cheap face mask recipes. Multani mitti, also known as Fuller’s earth, is arguably the most common face mask ingredient in households for treating acne concerns. This clay-textured soil offers an array of benefits including treating acne, brightening skin complexion, reducing pigmentation, cleansing the skin, and controlling excess oil production.
Oatmeal serves as another excellent oil-absorbing ingredient for your homemade acne mask ingredients. This social-media favorite beauty ingredient is rich in antioxidants and anti-inflammatory properties, making it a must-have for those with acne-prone skin. When you grind oatmeal into a powder and combine it with water or other ingredients, it creates an effective cleansing mask that absorbs excess oil, clears blackheads, and helps diminish acne scars.
Both clay and oatmeal work by drawing impurities from your pores while gently exfoliating dead skin cells that can contribute to clogged pores and breakouts.
Honey brings powerful antibacterial and anti-inflammatory properties to your DIY face mask for clear skin. Raw honey is particularly effective as it’s filled with natural compounds that can help reduce the appearance of red spots and promote healing. You can use honey as a spot treatment by applying a thin layer directly to affected areas, or combine it with other ingredients for a full-face mask.
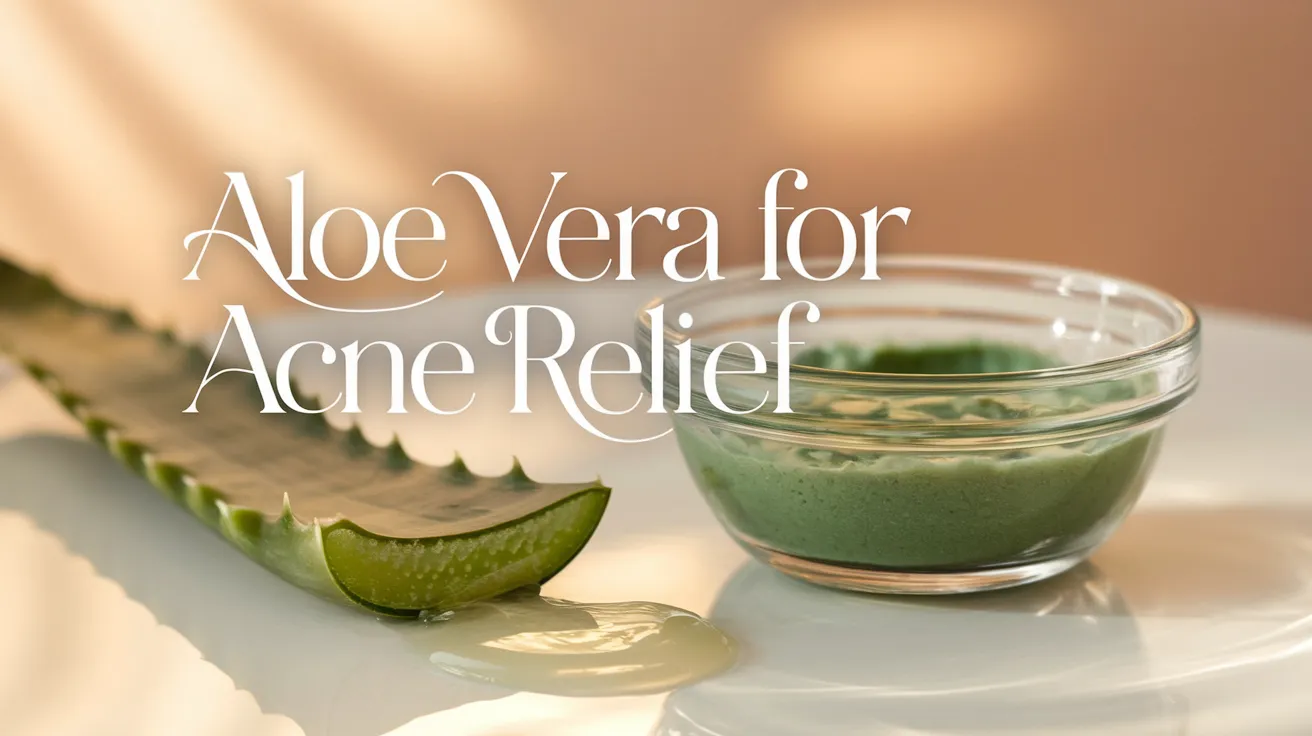
Aloe vera has been a fan-favorite for decades, owing to its antibacterial and refreshing properties. This naturally calming and cooling ingredient soothes and calms irritated skin while cleansing pores and mitigating acne-causing bacteria. When you combine aloe vera gel with honey and other ingredients like cinnamon powder, you create a multi-functional mask that addresses multiple acne concerns simultaneously.
The healing properties of both honey and aloe vera make them essential components in any natural acne fighting ingredients arsenal, providing the moisture and nourishment your skin needs while fighting breakouts.
Neem has been praised by generations for its detoxifying properties, making it a truly effective organic approach to skincare. This Ayurvedic superfood is rich in antioxidants and possesses antibacterial and healing properties that make it invaluable in your budget acne treatment routine. You can prepare fresh neem paste by grinding neem leaves and blending them with honey and rose water for a nourishing mask.
Turmeric has been used on skin since time immemorial for its anti-inflammatory properties. When you combine turmeric with antioxidant-rich honey, you create a powerful combination that soothes and moisturizes the skin while preventing breakouts. The anti-inflammatory nature of turmeric makes it particularly effective for reducing redness and irritation associated with acne.
Multani mitti deserves special mention as it combines beautifully with turmeric and sandalwood powder. You can customize this traditional recipe by adding milk, rose water, or lemon juice to create a paste suitable for your specific skin needs. These time-tested ingredients offer proven results in your homemade pimple mask formulations, providing deep cleansing and oil control that rivals expensive commercial treatments.
Your green tea mask harnesses powerful anti-inflammatory properties to calm irritated, acne-prone skin. Green tea contains antioxidants that soothe redness and reduce inflammation associated with breakouts. To create this simple yet effective mask, brew 3 teaspoons of green tea strongly and allow it to cool completely. Mix 2 tablespoons of rosewater with the cooled green tea, then add ½ teaspoon of rosehip oil for additional nourishing benefits. You can apply this mixture using a pre-cut cotton sheet mask or create your own by cutting holes in a paper towel for your eyes, nose, and mouth. Soak your chosen mask material in the green tea mixture for 60 seconds, gently squeeze out excess liquid, then place it over your clean face for 10-15 minutes before rinsing with water.
Now that we’ve covered the anti-inflammatory benefits of green tea, let’s explore aloe vera’s dual-action properties for acne treatment. Aloe vera provides both soothing relief and antibacterial protection, making it ideal for inflamed, irritated skin. You can create a simple charcoal and aloe mask by combining 1 tablespoon of activated charcoal with 1 tablespoon of aloe vera gel and 1 drop of tea tree essential oil. Mix these ingredients in a small bowl, then apply using circular motions around your face for 1 minute before letting the mask sit for 10-15 minutes. The charcoal absorbs excess oil while aloe reduces inflammation and promotes faster healing. Alternatively, combine 2 tablespoons of aloe vera gel with 2 drops of tea tree essential oil and 1 egg white for enhanced antibacterial properties. Whip the egg white until fluffy, then add the aloe and tea tree oil before applying to your face for 10-15 minutes.
With this in mind, next we’ll see how clay-based masks excel at controlling excess oil production. Multani mitti (bentonite clay) draws out impurities from deep within your pores while promoting collagen production and detoxification. Your turmeric and clay combination creates a powerful oil-controlling treatment that also addresses inflammation. Mix 1 tablespoon of bentonite clay with ½ teaspoon of turmeric powder and 1-2 tablespoons of raw honey to create a paste. The natural acids in this mixture help shrink pores to limit excess oil secretion while gently sloughing away dead skin cells. Apply the mask evenly across your face and let it sit for 15 minutes before rinsing with cool water. For enhanced benefits, you can add 1 probiotic capsule (powder only) to support your skin’s microbiome. Follow with your usual moisturizer to prevent over-drying.
Previously, I’ve mentioned how certain ingredients can help with post-inflammatory hyperpigmentation. Your banana mask specifically targets acne scars while controlling oily skin. Bananas naturally absorb excess oil while providing nutrients that promote skin healing and brightening. To create this effective treatment, mash 1 ripe banana in a bowl until smooth, then add 10 drops of lemon juice and 1 teaspoon of extra virgin olive oil to create a liquid paste. The lemon juice provides natural lightening properties that help fade hyperpigmented areas, while the olive oil prevents the mask from being too drying. Apply this mixture over your face, focusing on areas with acne scars, and let it sit for 15 minutes before washing off with warm water. Use caution with lemon juice as it can make your skin photosensitive, so preferably apply this mask at nighttime and use zinc oxide 30+ SPF sunscreen the following day.
Now that we have covered brightening treatments, your neem-based detoxifying mask provides deep cleansing properties specifically targeting acne-causing bacteria. While neem isn’t extensively detailed in the reference materials, you can create effective deep cleansing treatments using ingredients that work similarly. A deep cleansing comedone mask combines 1 egg white (beaten until fluffy), ½ teaspoon bentonite clay, and ¼ teaspoon lemon juice. This mixture forms a paste that you can apply to your t-zone or any blackhead-prone areas. If the consistency is too thick, add ½ teaspoon of water. After 10 minutes, when the mask is dry and cracking on your face, rinse with warm water and follow with appropriate nighttime moisturizer. This treatment should be applied once a week at night since the lemon juice can make skin photosensitive.
With this foundation established, your oatmeal mask provides gentle yet effective exfoliation for blackhead removal. Ground oats are incredibly soothing for dry, itchy, or irritated skin while offering natural exfoliating properties. Combine 2 teaspoons of oatmeal with 1 teaspoon of baking soda in a bowl, then slowly add a few drops of water to create a paste. Both ingredients work to remove dead skin cells and unclog pores that lead to blackhead formation. Gently massage this paste over your face, paying special attention to blackhead-prone areas like your nose, chin, and forehead. Allow the mask to dry completely before washing off with warm water and applying moisturizer. For enhanced benefits, you can create an overnight oat milk treatment by combining 2 tablespoons of unsweetened oat milk with 2 drops of ginger root essential oil and 3 drops of blue tansy oil. Apply this gentler version with a cotton ball and leave on overnight before rinsing in the morning.
Previously, I’ve discussed how honey provides powerful antibacterial properties for acne treatment. Your honey and cinnamon combination creates an intensive antibacterial treatment that targets acne-causing bacteria while providing anti-inflammatory benefits. Raw honey naturally unclogs pores and fights bacteria, making it ideal for spot treatments or larger affected areas. For a simple one-ingredient treatment, dab manuka honey directly onto blemishes using clean fingers, leave for 10-15 minutes, then rinse with warm water. To enhance the antibacterial effects, you can create a more complex treatment by combining honey with other ingredients. Mix 3 crushed aspirin tablets (not enteric-coated) with ½ teaspoon honey and 1 tablespoon plain yogurt to create a paste. The aspirin’s salicylic acid unclogs pores and calms redness, while yogurt’s lactic acid dissolves dead skin. Apply this mixture as a spot treatment, leave for 10 minutes, then rinse with warm water.
Now that we have covered antibacterial treatments, your yogurt and lemon mask combines gentle exfoliation with natural brightening properties. The lactic acid in whole milk and yogurt provides gentle exfoliation while helping to dissolve dead skin cells. Create a cucumber and yogurt probiotic mask by pureeing ½ cucumber (including seeds and skin) and mixing with 2 tablespoons of plain yogurt and 1 probiotic capsule powder. This combination calms skin with naturally anti-inflammatory cucumbers while providing probiotics to nourish your skin’s microbiome. The high levels of caffeic acid in cucumbers reduce swelling and inflammation, making this mask especially beneficial after sun exposure. Apply to clean face with clean hands, avoiding the eye area, and leave for 15 minutes before rinsing with warm water. For enhanced brightening effects, you can add a small amount of lemon juice, but use caution as this increases photosensitivity.
With this in mind, next we’ll explore how tea tree oil provides targeted antibacterial action for acne treatment. Tea tree oil is one of the most effective essential oils for fighting acne due to its natural antibacterial properties that specifically target acne-causing bacteria. Your tea tree and aloe mask combines the antibacterial power of tea tree with the soothing properties of aloe vera. Mix 2 tablespoons of aloe vera gel with 2 drops of tea tree essential oil and 1 egg white in a small bowl. Whip the egg white until fluffy before adding the other ingredients, then apply the mixture to your face using fingertips or a facial brush. Leave this treatment on for 10-15 minutes before rinsing thoroughly. For a more intensive treatment, combine tea tree oil with activated charcoal by mixing 1 tablespoon activated charcoal, 1 tablespoon aloe vera gel, and 1 drop tea tree oil. Work this mixture around your face in circular motions for 1 minute, then let sit for 10-15 minutes before rinsing with warm water.
Previously, I’ve mentioned charcoal’s oil-absorbing properties. Your charcoal mask provides intensive deep pore cleansing that draws out impurities and excess oil from within your pores. Activated charcoal works like a magnet, attracting and absorbing toxins, dirt, and excess sebum that can clog pores and lead to breakouts. Create your charcoal and aloe mask by combining 1 tablespoon of activated charcoal with 1 tablespoon of aloe vera gel and 1 drop of tea tree essential oil in a small bowl. The aloe vera ensures the treatment won’t over-dry your skin or send oily skin into overdrive, while providing anti-inflammatory benefits and faster healing properties. Apply this mixture using circular motions around your face for 1 minute to help work the charcoal into your pores, then allow the mask to sit for 10-15 minutes. Rinse thoroughly with warm water to remove all charcoal particles. This deep cleansing treatment is particularly effective for those with oily, acne-prone skin who need intensive pore purification without irritation.
Before applying your homemade face mask for acne, proper skin preparation is crucial for maximizing the effectiveness of your DIY acne treatment. Start by thoroughly cleansing your face with a gentle cleanser to remove all traces of dirt, oil, makeup, and environmental pollutants. Work up a good lather and gently massage the cleanser into your skin using circular motions, moving from the bottom of your face to the top and from the center outwards. Pay special attention to your T-zone area, as this region tends to accumulate more oil and impurities.
After cleansing, rinse your face with lukewarm water rather than hot water to keep your pores open and receptive to the natural acne fighting ingredients in your homemade mask. For enhanced preparation, consider gentle exfoliation to remove dead skin cells, which allows your budget acne treatment to penetrate more effectively into your skin. You can follow up with a toner applied using a cotton pad, sweeping from the center of your face outward to further prepare your skin for optimal absorption of your cheap face mask recipes.
Now that your skin is properly prepared, it’s time to apply your homemade acne mask using the correct technique. The application method will depend on the consistency of your DIY face mask for clear skin. For cream or gel-based homemade pimple masks, use clean fingertips or a soft brush to apply an even layer across your entire face. Avoid the delicate eye and lip areas unless your specific acne mask recipes at home are formulated for these sensitive zones.
When applying your natural acne remedies mask, start from the center of your face and work outward in gentle, upward strokes. Ensure you create a uniform layer that’s thick enough to be effective but not so heavy that it drips. Pay particular attention to acne-prone areas like your forehead, nose, and chin, where you may want to apply a slightly thicker layer of your homemade face mask for acne.
For clay-based masks using natural acne fighting ingredients, apply a thin, even layer focusing especially on oily areas. Don’t forget to extend the application to your neck area for consistent results across your entire complexion.
Timing is essential when using your homemade acne treatment to achieve optimal results without causing irritation. Most DIY acne treatments should be left on for 10-15 minutes, though this can vary depending on your specific recipe and skin sensitivity. Clay-based masks typically require 10-15 minutes, while hydrating masks with gentler ingredients may be left on for 15-20 minutes.
Never exceed the recommended time, as overexposure can lead to skin irritation or excessive dryness. Watch for signs that your mask is ready to be removed – clay masks should feel slightly tight but shouldn’t be completely dried and cracking on your skin.
To remove your budget acne treatment mask, use lukewarm water and gently massage in circular motions to help lift away the mask while providing mild exfoliation. You may use a soft, damp washcloth if needed, but avoid scrubbing harshly. Ensure all traces of the mask are completely removed from your face and hairline.
After removing your homemade face mask for acne, your skin care routine isn’t complete. Pat your face dry with a clean, soft towel using gentle pressing motions rather than rubbing. Your skin may feel tight or slightly sensitive immediately after using natural acne remedies, which is normal.
The final crucial step is to lock in the benefits of your DIY face mask for clear skin by applying an appropriate moisturizer. Even if your skin feels deeply treated after your acne mask, applying a lightweight, non-comedogenic moisturizer helps seal in hydration and maintains your skin’s natural barrier. Take a small amount of moisturizer and dot it evenly across your face, then spread gently from the center outward.
This post-mask moisturizing step is particularly important because many homemade acne mask ingredients can be drying, and proper hydration helps prevent your skin from overproducing oil in response to dryness. Choose a moisturizer that complements your acne-fighting routine without clogging pores, ensuring your cheap face mask recipes deliver long-lasting results for clearer, healthier-looking skin.
When you’re dealing with active breakouts, your homemade face mask for acne needs ingredients that specifically target surface bacteria and reduce inflammation. Based on proven acne treatment methods, you’ll want to focus on ingredients that mirror the effectiveness of benzoyl peroxide and salicylic acid found in commercial treatments.
For active pimples and inflamed areas, honey serves as a natural antibacterial agent that kills microorganisms on your skin while reducing swelling. Combine it with oatmeal, which provides gentle anti-inflammatory properties similar to azelaic acid’s natural grain-derived benefits. This DIY acne treatment combination helps control surface bacteria that aggravate existing breakouts without the harsh irritation of synthetic alternatives.
Tea tree oil, when properly diluted, acts as a natural antibiotic that can destroy bacteria and prevent them from multiplying in your pores. Mix 2-3 drops with clay-based masks to create a powerful natural acne remedy that targets inflamed nodules effectively.
Now that we’ve covered active breakout treatment, let’s focus on preventing future acne by addressing clogged pores. Your homemade pimple mask should include ingredients that dissolve dead skin cells and prevent hair follicles from becoming blocked.
Baking soda works similarly to salicylic acid by helping remove the top layer of damaged skin. Create a gentle exfoliating paste by mixing baking soda with water, which helps break up blackheads and whiteheads naturally. This cheap face mask recipe prevents the formation of new pimples by keeping pores clear.
Egg whites provide a natural astringent effect that tightens pores and removes excess oil. When combined with lemon juice (rich in natural acids), this combination helps dissolve the debris that leads to blackhead formation. Apply this mixture as a peel-off mask to physically remove pore-clogging materials.
With clogged pores addressed, your next focus should be reducing the visible appearance of enlarged pores. Natural acne fighting ingredients that tighten and refine skin texture work best for this concern.
Witch hazel acts as a natural astringent that temporarily tightens pore openings, creating smoother-looking skin. Combine it with clay masks made from bentonite or kaolin clay, which absorb excess oil and create a tightening effect as they dry.
Green tea, when cooled and used as a base for your acne mask recipes at home, provides antioxidants that help refine skin texture. The natural tannins in green tea offer mild astringent properties that can minimize pore visibility while providing anti-inflammatory benefits.
Previously, we’ve focused on active treatment, but addressing post-acne marks requires different natural ingredients that promote skin renewal. Your budget acne treatment approach should include components that encourage new, healthy skin growth.
Lemon juice contains natural acids that help remove the top layer of damaged skin, similar to chemical peels used in professional treatments. When used consistently in your homemade face mask for acne, it can gradually lighten dark spots left behind by previous breakouts.
Turmeric provides anti-inflammatory properties while promoting wound healing response in your skin. Mix turmeric with yogurt or honey to create a mask that encourages the growth of new skin to replace scarred areas. This DIY face mask for clear skin approach relies on your body’s natural healing mechanisms to fade acne marks over time.
Potato juice, rich in vitamin C and natural enzymes, helps brighten skin and fade post-inflammatory hyperpigmentation. Apply thin slices directly to affected areas or blend into your regular mask routine for gradual improvement in scar appearance.
Now that we have covered the various homemade acne mask recipes, you need to understand how often to use these treatments for optimal results. Your skin type determines the ideal frequency for applying your DIY acne treatment masks.
For oily and acne-prone skin, you can safely use homemade face mask for acne recipes 2-3 times per week. This frequency allows your skin to benefit from the natural acne fighting ingredients without over-drying or irritating your complexion. If you have combination skin, focus on applying masks primarily to your T-zone where oil production is highest.
Those with sensitive or dry skin should limit their natural acne remedies to once per week initially. You can gradually increase frequency to twice weekly if your skin tolerates the treatment well. For normal skin types, twice weekly applications of your chosen homemade acne mask ingredients typically provide the best balance between effectiveness and skin health.
Previously, we’ve discussed powerful ingredients in cheap face mask recipes, but you must always perform patch testing before applying any new homemade pimple mask to your entire face. This crucial safety step prevents adverse reactions and ensures your chosen budget acne treatment won’t cause irritation.
Apply a small amount of your mixed mask to a discreet area, such as behind your ear or on your inner wrist. Wait 24-48 hours to observe any reactions including redness, itching, swelling, or burning sensations. If you experience any negative reactions during this period, avoid using that particular combination of ingredients on your face.
Even common household ingredients found in acne mask recipes at home can cause unexpected sensitivities. Some people may react to citrus acids, essential oils, or even oatmeal, making patch testing essential for every new recipe you try.
With this in mind, next, we’ll examine how to properly store your DIY face mask for clear skin preparations. Unlike commercial products, your homemade masks lack preservatives and have limited shelf lives.
Fresh masks containing ingredients like honey, yogurt, or egg whites should be used immediately after preparation. Any leftover mixture should be refrigerated and used within 24-48 hours maximum. Store these mixtures in clean, airtight containers to prevent bacterial contamination.
Dry ingredient combinations for your natural acne remedies can be prepared in advance and stored in sealed containers at room temperature for up to one month. Label containers with preparation dates and ingredient lists to track freshness and avoid confusion between different recipes.
You should avoid specific ingredients in your homemade face mask for acne during certain conditions or circumstances. If you have open wounds, active breakouts with broken skin, or recent chemical peel treatments, skip acidic ingredients like lemon juice or vinegar until your skin heals completely.
Pregnant or nursing women should avoid essential oils and certain plant-based ingredients that may cause hormonal disruptions. Additionally, if you’re taking prescription acne medications, consult your dermatologist before incorporating new DIY acne treatment methods into your routine, as some combinations may increase skin sensitivity or reduce medication effectiveness.
Discontinue use of any homemade acne mask ingredients if you experience persistent irritation, increased breakouts, or allergic reactions, and consider consulting a healthcare professional for persistent skin concerns.
Now that you’ve mastered the art of creating effective homemade face masks, it’s crucial to build a comprehensive skincare routine that maximizes your results. Your daily regimen should begin with gentle cleansing using non-abrasive cleansers that won’t strip your skin’s natural barriers. Follow up immediately with a quality moisturizer to lock in hydration and nourish your skin – this step is essential for maintaining the balanced moisture levels that prevent your sebaceous glands from overproducing oil.
Regular SPF use forms the cornerstone of any effective skincare routine, protecting your skin from harmful UV rays that can worsen acne and cause premature aging. Apply broad-spectrum sunscreen daily, even when using your homemade acne masks, as some natural ingredients can increase photosensitivity.
After incorporating your DIY face masks, perform routine skin examinations to monitor changes and track your progress. Early detection of any new developments ensures you can adjust your skincare approach accordingly. Remember that consistency in your basic cleanse-and-moisturize routine amplifies the effectiveness of your homemade treatments.
Your nutrition plays a significant role in supporting the effects of your homemade acne treatments from within. Focus on incorporating foods rich in fruits, vegetables, whole grains, lean proteins, and healthy fats into your daily meals. These nutrient-dense options provide essential vitamins, minerals, antioxidants, and omega-3 fatty acids that support skin health and combat oxidative stress – the same inflammatory processes your DIY masks target externally.
Hydrating foods like fruits and vegetables complement your topical treatments by maintaining optimal moisture levels throughout your body. Consider adding herbal teas and infused water to your daily routine, as these beverages contribute additional skin-supporting compounds while helping you meet your hydration goals.
While your homemade face masks work to clear existing breakouts, avoiding foods that trigger inflammation can prevent new blemishes from forming. Pay attention to how your skin responds to different dietary choices and adjust accordingly to support your clear skin goals.
With your DIY skincare routine established, addressing lifestyle factors becomes crucial for long-term success. Chronic stress can significantly undermine the effectiveness of even the most potent homemade acne treatments by triggering hormonal fluctuations that increase oil production and inflammation.
Practice healthy stress management techniques such as exercise, meditation, or engaging in hobbies to help manage stress levels and promote overall well-being. These activities support your skin’s natural healing processes while you’re using your homemade face masks.
Achieving a healthy sleep schedule amplifies your skincare efforts exponentially. Aim for 7-8 hours of uninterrupted sleep each night, as your sleeping hours represent primetime for bodily repair and rejuvenation. During these crucial hours, your skin works to heal from daily environmental damage and regenerate new cells – processes that directly enhance the results you’ll see from your homemade treatments.
Quality sleep also helps regulate stress hormones like cortisol, which can trigger acne flare-ups when elevated. By prioritizing consistent, restorative sleep alongside your DIY mask routine, you’re addressing acne from multiple angles for more comprehensive results.
Previously, I’ve mentioned the importance of internal hydration, but understanding the specific mechanisms can help you optimize your results. Your body consists of approximately 60% water, making adequate hydration essential for maintaining skin moisture balance and supporting the cellular processes that complement your homemade acne treatments.
According to the U.S. National Academies of Sciences, Engineering and Medicine, men should consume 15.5 cups of liquid daily, while women need 11.5 cups. Meeting these targets ensures your skin cells remain plump and healthy, creating an optimal environment for your DIY masks to penetrate effectively and deliver results.
Regular physical activity boosts blood circulation, delivering essential nutrients directly to your skin cells while promoting a healthy complexion. This enhanced circulation helps transport the beneficial compounds from your homemade face masks more efficiently throughout your skin tissue. Exercise also supports your body’s natural detoxification processes, helping eliminate the toxins and excess hormones that can contribute to acne formation.
After sweating during exercise, cleanse your skin promptly to remove impurities and bacteria that can clog pores and counteract your homemade treatment efforts. This post-workout cleansing ritual prevents the buildup of sweat and bacteria that could lead to new breakouts, ensuring your DIY skincare routine continues working effectively.
You don’t need to break the bank to achieve clear, healthy skin. With simple ingredients already sitting in your kitchen pantry, green tea, honey, oatmeal, and aloe vera, you can create powerful acne-fighting treatments that rival expensive commercial products. These natural ingredients offer proven anti-inflammatory, antibacterial, and antioxidant properties that target acne at its source while being gentle on your skin.
The key to success lies in consistency and proper application. Start with patch testing, establish a regular routine of 1-2 applications per week, and complement your DIY masks with healthy lifestyle habits like proper hydration, adequate sleep, and stress management. Remember that skincare is a journey, not a quick fix, so give your homemade treatments time to work their magic. Your wallet and your skin will thank you for choosing this natural, effective approach to achieving the clear complexion you’ve been searching for.

Your go-to guide for all things beauty and wellness, with a knack for uncovering the secrets to radiant skin and a balanced life.