
But here’s the good news: you don’t need to choose either option.
With just a few household items and the right technique, you can safely remove those acrylics without a drop of acetone. No salon appointment needed, no chemical burns, just your natural nails underneath—still intact and ready for their next adventure.
What’s the secret ingredient most DIY nail removers miss? It’s actually something sitting in your bathroom cabinet right now…
Acetone is harsh stuff—no two ways about it. When you soak your nails in acetone to remove acrylics, you’re essentially stripping away not just the fake nails but also your natural oils and moisture. Your nails didn’t sign up for that kind of treatment! Without these natural oils, your nails become brittle, thin, and prone to peeling. Think of it like washing your hair with dish soap—sure, it gets the job done, but at what cost?
Going acetone-free means your nails maintain their natural strength and flexibility. You’re preserving the keratin structure that keeps your nails healthy rather than breaking it down with chemicals. Plus, if you already have damaged nails, acetone will only make matters worse by further dehydrating them and possibly causing splitting.
Your body will thank you for skipping the acetone. That strong smell? It’s not just unpleasant—those fumes can cause headaches, dizziness, and irritation to your eyes and respiratory system. If you have sensitive skin, acetone can trigger redness, itching, or even a full-blown allergic reaction.
The planet benefits too. Acetone is classified as a volatile organic compound (VOC) that contributes to air pollution. When you pour it down the drain, it can contaminate water sources and harm aquatic life. By choosing acetone-free methods, you’re making a small but meaningful eco-friendly choice.
Before diving into removal, give your nails the best shot at coming out unscathed:
Trim them down: Cut your acrylics as short as possible with nail clippers. This reduces the amount of material you’ll need to remove.
Buff the surface: Gently buff the top layer of your acrylic nails. This breaks the seal and helps your removal method penetrate better.
Pre-soak with oil: Massage cuticle oil or olive oil around your nails about 30 minutes before starting. This creates a protective barrier and begins to loosen the adhesive.
Warm up: Take a warm shower or soak your hands in warm water for 10-15 minutes to soften the acrylic material.
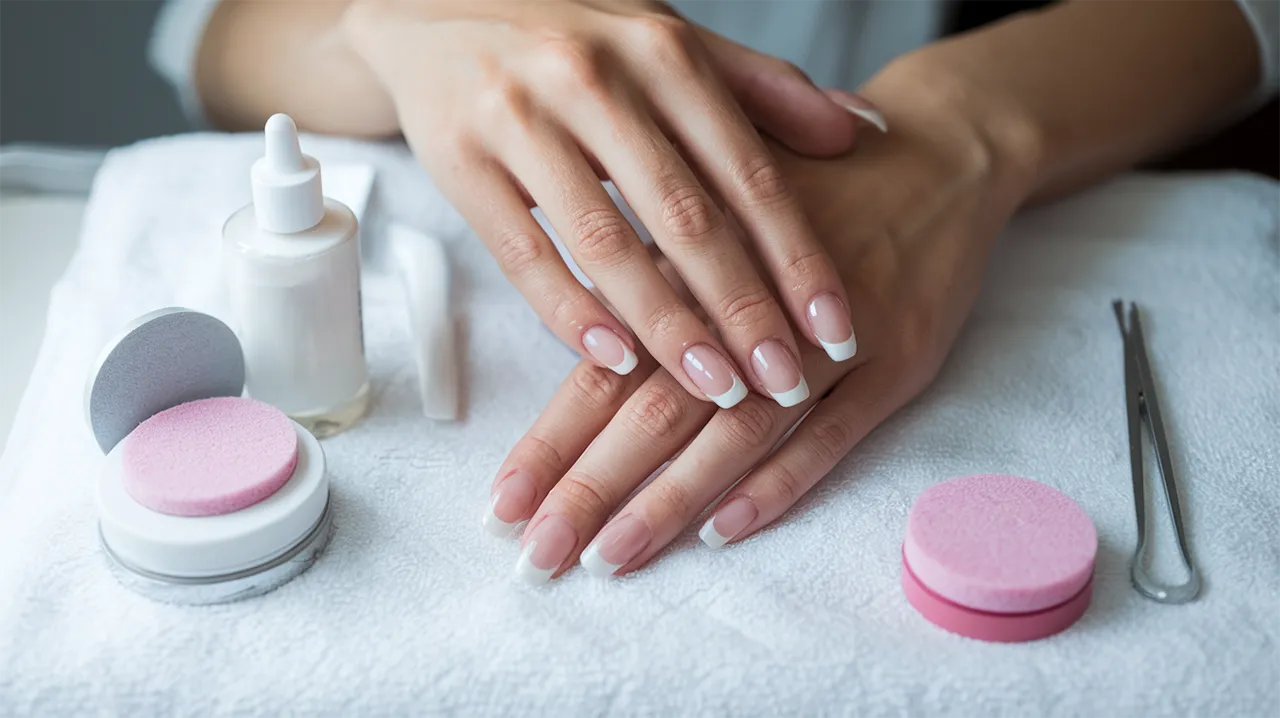
Gather these supplies before starting your acetone-free removal journey:
Nail clippers and file: For trimming and shaping
Buffer block: To gently remove the top layer
Cuticle oil or olive oil: For protection and loosening
Warm water: To soften the acrylics
Bowl: For soaking
Orangewood stick: To gently lift edges (never use metal tools!)
Dental floss: For the floss removal technique
Cotton balls and aluminum foil: For oil-soaking method
Nail strengthener: To apply after removal
Hand moisturizer: To rehydrate your skin post-removal
With everything prepared, you’ll be ready to tackle your acrylic removal safely and effectively without subjecting your nails to acetone’s harsh effects.

Getting the temperature right is key when you’re removing acrylic nails with warm water. Too hot and you’ll burn yourself, too cool and those stubborn acrylics won’t budge. Fill a medium-sized bowl with water that’s comfortably warm to the touch – think hot bath temperature, around 95-100°F. You should be able to keep your fingers in it without discomfort. The warmth helps to loosen the adhesive bond between your natural nail and the acrylic overlay.
If you don’t have a thermometer handy, test the water with your elbow – it should feel warm but not painful. Remember, you’ll need to soak for a while, so make sure the bowl is deep enough to fully submerge your fingertips.
While plain water works okay, adding a few drops of essential oils can transform this into a spa-like treatment that actually benefits your nails. Grab some jojoba, vitamin E, or olive oil – about a tablespoon should do the trick. These oils seep under the acrylic edges and help break down the adhesive while nourishing your natural nails.
Try these combinations for added benefits:
5 drops lavender oil + 3 drops tea tree oil (antimicrobial properties)
4 drops rosemary oil + 3 drops lemon oil (strengthening)
2 drops frankincense + 4 drops myrrh (healing damaged nail beds)
The oils will float on top of the water, coating your nails during the soaking process.
Patience is your best friend here. Dip all fingertips into your warm water bath and settle in for at least 20-30 minutes. The warm water needs time to penetrate and weaken the acrylic. Don’t rush this step – those acrylics took time to apply and they’ll take time to remove.
Pro tip: Refresh the water when it cools down. A lukewarm solution won’t be as effective. Every 10 minutes or so, add more hot water to maintain the temperature.
For extra effectiveness, gently move your fingers around occasionally to allow the water (and oils if you’ve added them) to work into all the edges of the acrylic.
After your soak, you’ll notice the edges of the acrylics starting to loosen. This is your moment! Grab an orange stick or wooden cuticle pusher – metal tools can damage your natural nails.
Start at the cuticle area where the lifting usually begins and slowly work the tool under the edge of the acrylic. Apply gentle pressure away from your nail bed. The key word here is GENTLE. If you meet resistance, don’t force it! That means you need more soaking time.
Work around the edges first, then gradually move toward the center of the nail. The acrylic should lift without causing pain. If it hurts, stop and soak longer.
Your natural nails have been through a lot! They’re likely thin and fragile after having acrylics on them. Now’s the time to give them some serious TLC.
First, gently buff the surface with the softest nail buffer you can find to smooth any remaining adhesive. Then wash your hands to remove any residue.
Apply a rich cuticle oil or cream immediately – your nails are extra absorbent right now. Follow with a strengthening treatment like OPI Nail Envy or a DIY mixture of equal parts coconut oil and honey.
For the next two weeks, maintain this routine:
Apply cuticle oil twice daily
Wear gloves for cleaning and dishes
Take a nail-strengthening supplement containing biotin
Keep your nails short until they regain strength
Skip polish for a week to let your nails breathe
Your natural nails should be back in fighting shape within a month with proper care.
Not all dental floss works the same for removing acrylic nails. You’ll want to grab unflavored, unwaxed floss that’s strong enough to slide under the nail without breaking. Waxed floss can be too slippery for this technique, making it harder to grip the acrylic properly. The thicker, ribbon-style dental floss works best because it provides more surface area to lift the nail. Avoid dental tape or super thin floss as they might snap during the removal process and leave you starting over.
Before you jump in with the floss, you need a way to get underneath the acrylic. Soak your nails in warm water for about 15 minutes to soften the area. Then grab a wooden orange stick or cuticle pusher and gently work around the edges of each acrylic nail. Focus on the area near the cuticle where growth has created a small gap. Be patient here – forcing it will damage your natural nail. You just need enough space to slide the dental floss under, not completely separate the acrylic.
Now for the actual removal. Take about 12 inches of floss and wrap the ends around your index fingers on both hands, just like you would for flossing teeth. Slide the middle part under the acrylic at the entry point you created. Using a gentle sawing motion, work the floss deeper under the nail toward the tip. Once you’ve got good coverage underneath, pull the floss upward in a see-saw motion while applying gentle pressure toward the nail tip. The acrylic should gradually lift away from your natural nail. Take your time with each nail – rushing increases the risk of pain and damage.
The dental floss method is faster than soaking, but it comes with higher risks if done carelessly. Always keep the floss flat against your natural nail, never angling downward which could cut into your nail bed. If you feel pain, stop immediately and try a different angle or go back to soaking. After removal, your natural nails will be thin and vulnerable, so apply cuticle oil right away and keep them moisturized with nail strengthener. Give your nails at least a two-week break before applying any new acrylics to allow them to recover their strength and natural oils.

Want to ditch those acrylics without acetone? Your kitchen cupboard might just have what you need. Olive oil, coconut oil, and jojoba oil are powerful allies in your nail removal journey. These oils work by slowly penetrating the acrylic and loosening the bond between the fake nail and your natural nail.
Olive oil is likely sitting in your pantry right now and works wonders thanks to its high fat content. Coconut oil not only helps break down the adhesive but also conditions your nails and cuticles during the process. Jojoba oil closely resembles your skin’s natural oils, making it particularly effective at seeping under those stubborn acrylics.
Mix two tablespoons of olive oil with one tablespoon of fresh lemon juice in a small bowl. The acid in the lemon juice helps break down the acrylic while the olive oil softens it. Warm this mixture slightly (about 20 seconds in the microwave) to boost its effectiveness – but make sure it’s not too hot to touch!
This combo packs a double punch: the oil softens while the citric acid gently dissolves the adhesive. Plus, the lemon’s natural brightening properties help reduce any yellowing that might have occurred under those acrylics.
Got concerns about bacteria lurking under those long-worn acrylics? Here’s a powerhouse combo: Mix 2 tablespoons of melted coconut oil with 5-7 drops of tea tree oil. Coconut oil’s medium-chain fatty acids help dissolve the acrylic bond, while tea tree oil brings serious germ-fighting properties to the table.
This mixture not only helps remove your acrylics but also reduces the risk of infection – especially important if your natural nails have become thin or damaged under those acrylics. The antimicrobial properties of tea tree oil help kill any bacteria that might be hanging out between your natural nail and the acrylic.
Don’t just slap that oil on and hope for the best. Here’s how to make it really work:
File the top layer of your acrylics first to remove the seal and help the oil penetrate
Warm your oil mixture slightly for better absorption
Apply generously to each nail using a cotton ball
Cover with plastic wrap to prevent evaporation
Put on cotton gloves or wrap fingers in foil to trap heat
For extra effectiveness, gently massage the oils into and around your nails every 10-15 minutes. This movement helps the oils work their way under the acrylic edges.
Patience is your friend when removing acrylics with oils. Unlike acetone that works in 30 minutes or so, oil-based methods take longer but are gentler on your nails and skin.
Plan for at least 40-60 minutes of soaking time for moderately worn acrylics. If you’ve had your set for over three weeks, you might need up to 2 hours of oil contact time. During this period, the oils slowly work to dissolve the bond between the acrylic and your natural nail.
After soaking, gently test one nail by applying slight pressure with an orange stick at the cuticle edge. If there’s resistance, soak longer. The nail should lift easily without forcing it when the oil has done its job properly. Rushing this process risks damaging your natural nails, so settle in with your favorite show and give those oils time to work their magic.

When it comes to filing down acrylic nails, not all nail files are created equal. You’ll need a coarse nail file (around 100-180 grit) to start breaking down the acrylic surface. These coarser files work faster on the thick acrylic layer but should never be used on your natural nails.
Once you’ve thinned the acrylic layer considerably, switch to a medium grit file (180-240) to continue the process more gently. For the final stages when you’re getting close to your natural nail, grab a fine grit buffer (240+ grit) to prevent damage.
Avoid using metal files or extremely rough emery boards as they can cause excessive friction, heat, and damage to both the acrylic and your natural nail bed underneath.
Start by filing the top layer of the acrylic nail in one direction only. Sawing back and forth creates heat and can weaken your natural nail. Focus on the thickest parts first, usually the middle of the nail.
Hold the file flat against the nail surface at a slight angle and use gentle, sweeping motions. Apply light pressure – pushing too hard can cause pain and damage. Take breaks every few minutes to brush away dust and check your progress.
Work systematically across each nail, maintaining even pressure. Remember to file the edges of the acrylic as well, working from the outside in toward the center of the nail.
This is crucial – knowing when to stop can mean the difference between healthy nails and damaged ones. Stop filing when the acrylic layer becomes thin and slightly flexible. You’ll notice the color change as you get closer to your natural nail.
If you start feeling any warmth or sensitivity, that’s your cue to stop immediately. You’re getting too close to your natural nail. You should still see a very thin layer of acrylic – don’t try to remove absolutely everything with filing.
When the acrylic becomes translucent and you can almost see your natural nail through it, it’s time to switch to gentler removal methods. At this point, you can try soaking the remaining thin layer in warm soapy water with olive oil to help lift the edges, then gently push the remaining acrylic off with an orange wood stick.
After removing your acrylics, your natural nails need some serious TLC. They’re likely thin, brittle, and begging for moisture. Here’s what works wonders:
Cuticle oil – Apply it 2-3 times daily. The best ones contain jojoba oil or vitamin E, which penetrate the nail bed deeply.
Nail baths – Soak your fingertips in warm olive oil for 10-15 minutes. This is a game-changer for dry, flaky nails.
Keratin treatments – Your nails are made of keratin, so replenishing it makes perfect sense. Look for nail products with hydrolyzed keratin or try a DIY version with a beaten egg (rich in protein) applied to nails for 20 minutes.
Vitamin E capsules – Pierce one open and rub the oil directly onto your nails and cuticles before bed. Wake up to noticeably more hydrated nails.
Whip up these kitchen-based nail saviors:
Mix 1 tablespoon olive oil with a few drops of lemon juice. The vitamin C helps rebuild collagen while the oil moisturizes. Massage into nails for 5 minutes, then leave on for another 15.
Crush 2 garlic cloves and mix with 1/2 teaspoon coconut oil. Yes, it smells strong, but garlic contains selenium and sulfur compounds that strengthen nail structure. Apply and leave on for 10 minutes.
Beat 1 egg yolk with 1 teaspoon honey. The protein rebuilds nail structure while honey locks in moisture. Apply weekly for 20 minutes.
Your freshly revealed natural nails are super vulnerable right now. Protect them by:
Keeping nails short – Long nails create leverage that leads to breaks. Trim them just past your fingertips.
Wearing gloves – For dishes, cleaning, gardening – anything involving water or chemicals. This isn’t optional if you want healthy nails!
Avoiding harsh products – Skip nail polish removers with acetone completely for at least 2 weeks.
Taking biotin supplements – 2,500-5,000 mcg daily can dramatically strengthen nails from the inside out.
Staying hydrated – Brittle nails often signal dehydration. Aim for at least 8 glasses of water daily.
Recovery doesn’t happen overnight, but here’s what to expect:
Week 1-2: Focus on rehydration. Your nails will still look rough but should feel less brittle.
Week 3-4: New nail growth begins. The difference between damaged nail and new growth becomes visible.
Week 6-8: About half your nail has grown out if you’re diligent with treatments.
Months 3-4: Complete nail regeneration for most people. Your nails should look normal and healthy, with no trace of damage.
Remember that nail growth averages only 3.5mm per month, so patience is key. The more consistent you are with treatments, the faster you’ll see results.
Taking off your acrylic nails at home without acetone is entirely possible with the methods we’ve explored. From the gentle warm water soaking method to the quick dental floss technique, you have several options that can protect your natural nails from harsh chemicals. Natural oils provide a nourishing alternative, while the filing method offers a gradual approach for those who aren’t in a rush. Remember that each method comes with its own set of risks and benefits, so choose the one that best suits your situation and comfort level.
After removing your acrylics, don’t skip the aftercare steps! Your natural nails will need extra attention and rehabilitation to regain their strength and health. Apply cuticle oil regularly, keep your nails moisturized, and give them time to breathe before your next manicure. By following these gentle removal techniques and dedicated aftercare, you’ll maintain healthier natural nails while still enjoying beautiful manicures when you want them.