
Don’t worry, removing gel nail polish at home doesn’t have to wreck your nails. I’m about to show you how to get those stubborn gels off without the salon price tag or the nail damage drama.
The trick isn’t just about finding any old removal method. It’s about finding the right one for your nail type and gel formula. And honestly? The technique that works best might surprise you.

Taking off gel polish the right way isn’t just about getting ready for your next manicure. It’s actually crucial for keeping your nails healthy and strong. When you peel or force gel polish off, you’re not just removing the polish—you’re taking layers of your natural nail with it. This leads to thin, brittle nails that break easily and take months to recover.
Proper removal preserves the integrity of your nail bed and cuticles. Think of your nails like fine china—they deserve gentle handling, not rough treatment. When you remove gel correctly, your natural nails remain strong enough to grow longer and hold future manicures better.
You might be guilty of these nail-damaging habits without even realizing it:
Peeling off your gel polish: So tempting when it starts lifting, but this strips away layers of your natural nail
Aggressive filing: Filing too roughly can thin your nail plate permanently
Skipping the soaking step: Trying to rush the process by scraping without properly dissolving the polish first
Using metal tools to scrape: These can gouge your nail bed
Soaking too long: This dehydrates your nails and surrounding skin
One of the worst offenders is impatience. Rushing through removal almost guarantees nail damage that can take weeks or months to repair.
Going pro has its perks. Nail technicians have specialized training and tools that make the process faster and often gentler on your nails. But it comes with a price tag of $10-20 per removal session.
Doing it yourself at home saves money and can be just as effective if you’re careful. The main difference is time—professional removal typically takes 10-15 minutes, while at-home removal might take you 30-45 minutes to do properly.
Which option works best for you depends on your budget, time constraints, and how comfortable you are following proper removal techniques.
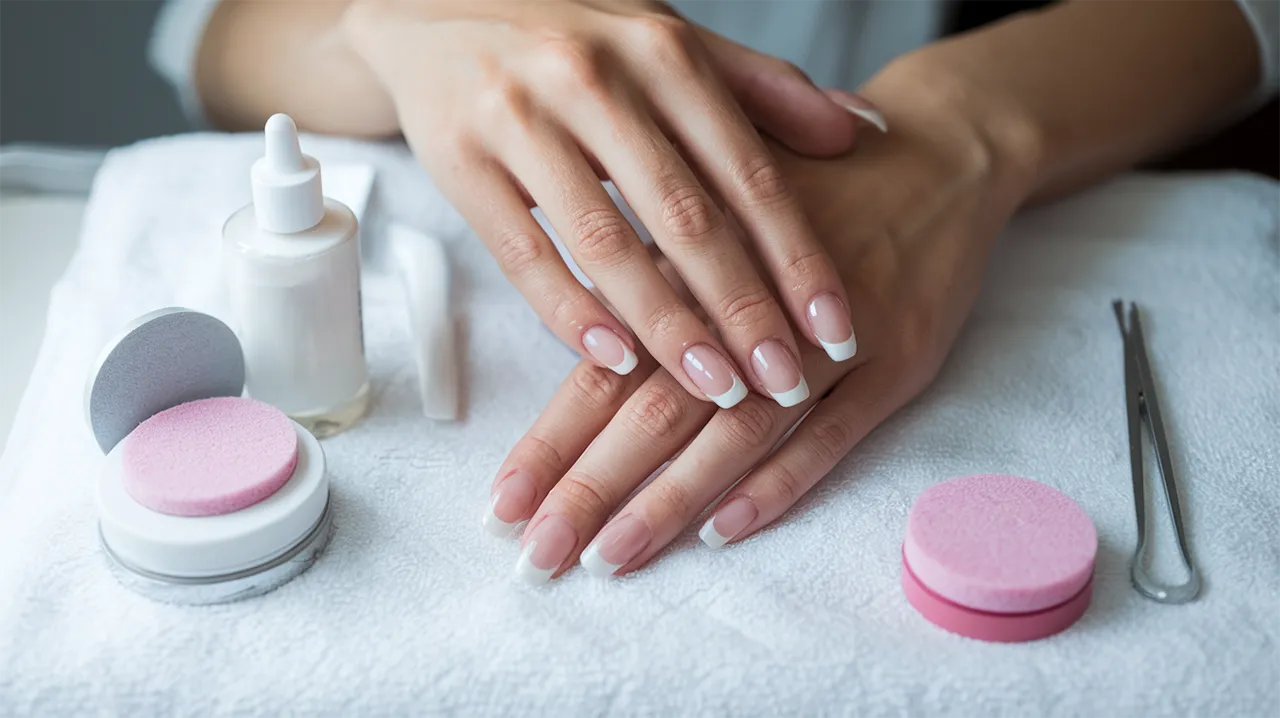
Gather these essentials before you start:
100% acetone: Regular nail polish remover won’t cut it for gel
Cotton balls or pads: For soaking your nails
Aluminum foil: Cut into squares to wrap around your fingertips
Wooden orange stick or cuticle pusher: For gently scraping removed polish
Buffer or fine-grit nail file: To lightly buff the nail surface
Cuticle oil: To rehydrate after removal
Nail strengthener: To condition nails post-removal
Optional but helpful additions include a nail clip system (plastic clips that hold the cotton and acetone in place) and hand cream to combat dryness from the acetone. Setting up all your supplies before you start makes the process much smoother and prevents you from having to stop halfway through.
Before diving into gel polish removal, proper preparation makes all the difference. Start by gathering your supplies: pure acetone, cotton balls or pads, aluminum foil cut into squares, a nail file, cuticle oil, and moisturizer. Choose a well-ventilated area since acetone fumes can be strong. Protect your work surface with a towel or paper towels to catch any spills.
First, gently file the top layer of your gel polish. This breaks the seal and allows the acetone to penetrate more effectively. Don’t go overboard—you just need to remove the shine, not file down to your natural nail. Apply a thin layer of petroleum jelly around your cuticles and fingertips to protect your skin from the drying effects of acetone.
The key to successful gel removal is properly constructed foil wraps. Take a cotton ball and saturate it with acetone—it should be wet but not dripping. Place the soaked cotton directly on your nail, then wrap your fingertip with a small piece of foil. Fold the foil tightly around your finger to create a snug seal, trapping the heat which helps speed up the removal process.
Pro tip: Work on one hand at a time, starting with your non-dominant hand. This makes the wrapping process easier to manage. If you’re struggling with the foil technique, pre-made nail clips or caps designed specifically for gel removal can be a worthwhile investment.
Different gel polish brands require different soaking times. As a general rule:
| Gel Polish Type | Recommended Soaking Time |
|---|---|
| Standard gel polish | 10-15 minutes |
| Hard gel/builder gel | 15-20 minutes |
| Gel-X or extensions | 20-25 minutes |
| Dip powder systems | 15-20 minutes |
Patience is crucial here. Removing the foil too soon means you’ll need to scrape harder, which damages your natural nails. If after the recommended time the gel isn’t lifting easily, re-wrap and wait another 5 minutes. The polish should look lifted and bubbly when ready to remove.
When it’s time to remove the foil wraps, don’t rush through all fingers at once. Remove one wrap, then gently press down on the nail with the cotton pad and slide it off toward the tip. The gel should come off with the cotton. For stubborn pieces, use a wooden cuticle stick (never metal tools) to gently push—not scrape—the gel off.
If large chunks of gel remain stuck, that’s a sign you need more soaking time. Re-wrap that nail and continue with the others. Never force gel polish off by picking or peeling, as this removes layers of your natural nail along with the polish.
Your nails will be dehydrated and possibly weakened after acetone exposure. Immediately apply cuticle oil to each nail and massage it in. Follow with a rich hand cream, focusing on your nail beds and cuticles.
Give your nails a recovery period of at least a week before applying new gel polish. During this time, apply cuticle oil 2-3 times daily and wear a nail strengthener if your nails feel particularly weak. Consider taking a biotin supplement to support nail health from the inside out.
If you notice any white spots or excessive thinning, your nails are signaling they need more recovery time. Listen to them! Rotating between gel manicures and regular polish gives your nails the breathing room they need to stay healthy long-term.
Ever tried removing gel polish with acetone only to find your nails feeling paper-thin afterward? Filing might be your new best friend. You should opt for the filing method when:
Your natural nails are already thin or damaged
You have sensitive skin that reacts poorly to acetone
You’re dealing with peeling or lifting gel polish
You want to avoid the drying effects of chemical removers
You’re short on time and need a quicker solution
Filing works especially well for spots where the gel polish has already started lifting. Why subject your entire nail to harsh chemicals when you can target just the problem areas?
The file you choose makes all the difference between gentle removal and nail damage. Here’s what you need to know:
180-240 grit: Your sweet spot for gel polish removal. Coarse enough to be effective but not so harsh that it destroys your natural nail.
100-180 grit: Too aggressive for direct use on natural nails. Save these for artificial nail surfaces only.
240+ grit: Too fine to effectively remove gel polish. Better for finishing and buffing.
Always grab a buffer block too – the different sides will help you smooth out your nail after filing.
Ready to file away that gel polish safely? Follow these steps:
Wash your hands thoroughly to remove oils that might interfere with the process.
Use your file to gently buff the shiny top coat of your gel polish. This breaks the seal and allows you to access the layers beneath.
Hold the file flat against your nail (not at an angle) and work with light, sweeping motions.
Focus on thinning the polish evenly across the entire nail rather than drilling down in one spot.
Take breaks to wipe away dust and check your progress.
Stop filing as soon as you see your natural nail showing through – don’t go any further!
If you hit a stubborn spot, don’t apply more pressure. That’s when damage happens.
Remember: patience is your friend here. Better to take an extra five minutes than damage your natural nails.
Sometimes a tag-team approach works best. You can significantly reduce acetone exposure while still getting effective results with this hybrid method:
File down about 70% of the gel polish thickness using the technique above.
Cut small squares of cotton, just enough to cover each nail.
Dampen (not soak) the cotton with acetone.
Place the cotton on your nail and wrap with a small piece of aluminum foil.
Wait just 5-7 minutes – much less than the typical 15-20 for full soaking.
Remove the foil and gently push off the loosened gel with a wooden cuticle stick.
This method gives you the best of both worlds – the speed and effectiveness of acetone with minimal exposure time. Your nails will thank you for not submitting them to a full acetone bath.
Tired of the acetone soak method? There’s good news! The beauty industry has developed specialized products specifically for gel polish removal that can be gentler on your nails.
These products typically contain ingredients like acetone alternatives, moisturizers, and nail strengtheners. Look for gel removal wraps, pens, or kits that promise to dissolve gel polish while conditioning your nails at the same time.
Many of these options come with convenient applicators that target just the nail, keeping the surrounding skin protected. Brands like Sally Hansen, Red Carpet Manicure, and Gelish offer removal systems that can make the process quicker and less damaging.
Simply follow the package instructions—most require you to apply the product, wait 10-15 minutes, and then gently push off the loosened polish.
The steam method is gaining popularity as a gentler approach to gel removal. This technique uses warm steam to help soften the gel polish bond.
To try this at home:
Fill a bowl with hot (not boiling) water
Add a few drops of cuticle oil
Place your fingers above the steam for 5-10 minutes
Carefully push off the softened gel with a wooden stick
This technique works best with thinner gel applications and may require patience. The benefit? Your nails won’t be subjected to harsh soaking, and the steam helps hydrate rather than dry out your nails and cuticles.
If your nails are particularly brittle or sensitive, the warm oil method might be your new best friend. This technique is incredibly gentle and nourishing.
To remove gel polish with warm oil:
Heat natural oil (olive, coconut, or jojoba work great) until warm but comfortable to touch
Soak your nails for 15-20 minutes
As the oil penetrates, it will slowly loosen the gel’s bond
Gently push the polish off with a wooden cuticle stick
This method takes longer than acetone soaking but provides deep conditioning while removing your polish. Your nails will thank you!
Planning ahead for your next gel manicure? Consider using a peel-off base coat underneath your gel polish. These innovative products create a layer that allows you to literally peel off your gel polish when you’re ready for a change.
Popular brands like UNT, Holo Taco, and OPI offer peel-off base coats that work well under gel systems. The trick is applying them correctly—apply a thin layer only to the nail plate (avoid the cuticles and sides) before your gel base coat.
When removal time comes, you can use a wooden stick to gently lift an edge and peel the entire gel manicure off in one piece. No soaking, filing, or harsh chemicals needed!
Keep in mind that manicures with peel-off base coats might not last quite as long as traditional applications, but the trade-off is damage-free removal that takes seconds rather than 20+ minutes.
Acetone is brutal on your nails. After removing gel polish, your nails probably feel dry, brittle, and unhappy. Time to give them some TLC! Massage cuticle oil into your nails and surrounding skin at least twice daily. Jojoba oil works wonders because its molecular structure is similar to your natural oils.
For an intensive treatment, try this overnight nail mask: mix equal parts honey and coconut oil, slather it on your nails, and wear cotton gloves to bed. Your nails will drink up this moisture while you sleep.
Don’t forget to apply hand cream after every wash. Keep a small tube in your bag, car, and desk. Rehydrating isn’t a one-and-done deal—it’s an ongoing process.
Weak, peeling nails need protein and nutrients. Pick up a nail strengthener with keratin, biotin, or calcium. Apply it every other day for two weeks.
Your diet matters too! Add these nail-friendly foods to your meals:
Eggs and lean protein for keratin building blocks
Almonds and walnuts for healthy fats
Leafy greens for iron and calcium
Berries for antioxidants that protect nail cells
A biotin supplement (2500-5000 mcg daily) can boost nail strength within a month. Just check with your doctor before starting any supplement regimen.
The best strengthening trick? Give your nails a breather. Short, natural nails can be super cute too!
After removal, your nails might look uneven or ragged. Don’t rush to file them immediately—wait 24 hours to let them rehydrate first.
When filing, only go in one direction (never saw back and forth). This prevents splitting and peeling. Use a glass file rather than emery boards—they’re gentler and last way longer.
For shape, mirror your cuticle line for the most flattering and durable result. If your nails are damaged, opt for a shorter, rounded shape which helps prevent further breakage and gives them time to grow out healthy.
Never clip the sides of your nails—this leads to ingrown nails and infection. File them instead.
Your nails are sending SOS signals if you notice:
White spots or discoloration
Ridges or bumps on the nail surface
Thinning or peeling layers
Painful sensitivity
These are clear signs you need a gel vacation. The ideal break? 2-4 weeks minimum. During this time, focus on the rehydrating and strengthening routines mentioned above.
Many nail pros recommend following the 3:1 rule—three gel manicures, then one month off. This schedule gives your nails enough recovery time without making you give up your gel habit completely.
During breaks, try non-gel alternatives like breathable nail polishes that allow moisture and oxygen to reach your nail bed.
Some nail issues go beyond at-home care. Get to a dermatologist or nail specialist if you notice:
Persistent pain or tenderness around nails
Green or yellow discoloration (potential infection)
Nails separating from the nail bed
Unusual thickening or thinning
Dark streaks or spots that weren’t there before
These symptoms could indicate fungal infections, bacterial problems, or even more serious conditions that require medical treatment.
Don’t try to cover up these issues with more gel polish—it’ll only make things worse. A professional can assess the damage and recommend proper treatment, possibly including medicated nail solutions or oral medications.
Remember, healthy natural nails are the foundation for gorgeous gel manicures in the future!
Removing gel nail polish at home doesn’t have to be intimidating or damaging to your nails. By understanding the different removal methods—from acetone soaking to gentle filing and alternative approaches—you can safely take off your gel polish without a trip to the salon. Each technique offers different benefits depending on your time constraints and nail sensitivity, giving you options that work best for your specific needs.
Remember that proper post-removal care is essential for maintaining healthy nails. After removing your gel polish, be sure to moisturize your cuticles, apply a strengthening treatment, and give your nails some breathing time between applications. With these methods and aftercare tips in your beauty arsenal, you’ll be able to enjoy beautiful nails while keeping them strong and healthy for your next manicure.